About Me

My photo
Jane of all trades, Master of none. Still on the search for the occupation that I can love.....

Thursday, December 12, 2013

Over a Year!

Wow! It's been over a year since my last post. And this one will be short. My 11+ pound dictator is asleep in the next room and I am stealing this time from some important task....like the piles of laundry in my bedroom! I never got around to posting the nursery Items that I made for Maria. Here they are. I promise to put Elizabeth's nursery next. And soon.... Here is the Quilt for her little boy. The bumper. The crib Skirt and the last is the window valence.

Monday, November 26, 2012

1st Annual Holiday Market at Waverly Place

This time of the year is so busy. I always seem to add more to my plate than what seems reasonable This year is no different. You would think that my erratic yoga teaching schedule, Etsy shop and baking I would be busy enough. But NO! I have to add a half marathon and dinner guest to the list! I also managed to add Bronchitis to the list! (running in 35 degree weather was against Dr's orders) Hooray for antibiotics! If you have visited SarenaVictoria.Etsy.com and thought that there were slim pickings then I am here to explain that the reason is below.
I took a lot of product to the market place. I've not found the time to photograph most of the product that I have had on location but will try to get that done soon. I would love to see you in person so if you have time and are planning any shopping in Cary, NC. Please stop by and say Hello! We would love to see you. You can also find some of our Yoga related items in person that would make great gifts at Hillsborough Yoga and Healing Arts Center. They have scarves, yoga blankets and slings. And Very soon I will be adding legwarmers to the mix! Its getting chilly!

Thursday, November 1, 2012

Porters Dog Biscuts from Spent Beer Grain

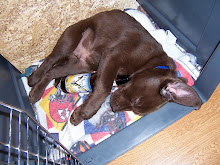
Most of the grain from Kit's beer brewing goes in the compost. But some of it goes in freezer bags or straight to the kitchen for "The Porter's" treats. I like to make them rather than buy them not so much because I am a crazy Dog lady! I'm so far from that but because a few years ago when we purchased the last few bags of treats from the big pet store the bag was full of those little res bugs! Yuck Out went the bag. and in came a friend with this recipe. Even if you dont brew as someone for the spent grain if you know a brewer.
Here is what you will need. 8 cups of spent grain 4 cups of whole wheat flour 3/4 cup of extra flour for rolling 2 cups of water 2 cups of peanut-butter
Heat the water and peanut-butter in a saucepan. It turns into a thick soup consistency which makes it easier to blend.
mix the grain and flour together and dump on to counter.
Make a well and add the peanut-butter soup
Once it has cooled mix together to form a ball. I usually cut into 2 half's for easier rolling
I use pretty small cookie cutters because it easier to train him with small rewards and they dry out a lot quicker. Use what you have on hand, remember the bigger they are the longer they take to cook.
Let them bake for 2.5 hours at 325 F. Then lower to 180-200 for 3 hours or until completely dried out. I leave them in the oven with the door closed overnight before placing them in an airtight container. Remember the have to dry out completely or they will mold.
You will be left with one happy dog standing at you from the doorway.....Waiting!

Friday, September 28, 2012

The Grandparents Vinyl Dining Chairs

The Grandparents, Eleanor & Raymond
I took my 2nd trip to northern Minnesota. To celebrate The Grandparents 70th Wedding Anniversary. Could you imagine being with the same person for 75 years and still being happy with each other. It was a lovely and rare thing to be a part of and witness. However the occasion did present a dilemma. What do you get the couple that has been able to collect what they wanted for 3/4 of a century? The idea came from my brother in law Jesse and his "Sweetheart" Sheena. (that's the title my mother in law gave her during introductions at the party)
On a recent visit Grand Eleanor expressed to them an interest in having her kitchen chairs recovered. She said that there were too many butts with hunting knives in there back pockets that damaged her vinyl. Sheena found a great fabric shop not too far from her place in St Paul where we picked up a great print in blue and white. I wish I had taken note of the name. They had wonderful selections of fabric...oh well. I'll up date If I remember. We took the seats off and gave them a little more cushion at Ray's request. The actual seat was pretty small so we only purchased a 1/2 yard per chair. The stuffing was covered in batting before the new vinyl went on to smooth over any lumps.
Did I mention that it only took Sheena and I a little over 2 hours. Using borrowed tools, In one of the most old-fashioned organized garages I have ever seen( that was a big help). We were all done with the taking apart, washing( Thanks Sheena, cat hair and I are not friends) stuffing, stapling, and re-assemble in time enough to get ready for the party.
See Grandpa Approved! I cant mention this quick and impromptu project with letting you know that Ray has an 8 track in his garage and as soon as Sheena went for her I phone to turn on Pandora, Ray powered up the 8 track full blast with the sounds of Buck Owens...Wow
I also have to mention that the Grandsons were drinking beer in the sauna and making brief trips to dunk themselves in a cold lake while there "sweethearts" were working on their grandparents chairs. Apparently Grandpa's, I'm here to do my ladies bidding(his words) attitude didn't get passed down that far.

Monday, September 3, 2012

Handmade Custom Nursery

Grey and yellow go so well together. When I see them I just smile. I made the quilt and received a request for a skirt to match. I think I may have to do these colors again.
Brittney picked these colors out for her lovely daughter Harper. There is a 3 piece crib skirt to go with the quilt.
She really wanted black out curtains so that nap time wouldn't be interrupted. So I simply trimmed the bottom to coordinate it with the valance.
The nursery has a on-suite and there is a valance to match. Brittney also picked out this fun loopy fabric to make a shower curtain.
Here is a close-up of the little peacock print. It is really, really cute!
If you think you would like some custom handmade items for your nursery, in place of the standard that you get from the big box stores, please contact me on my Etsy page. SarenaVictoria.etsy.com

Sunday, July 8, 2012

Side Chair Upholstery

There are a few different kinds of side chairs that I usually see. The two main ones are, old but strong and the new and so not worth it. The newer ones are made from lightweight knotted pine that will buck at anything over 200lbs put on them. Also there are a lot of staples underneath and lots of cardboard where wood should be. If you were to pick them up they are more lightweight that they should be. They suck unless they are just for show not for sitting.(FYI If you have children they wont last long)
This was an older chair that Jenny was having re-upholstered for her"husband's room" in the basement. The frame is in good shape. However the suspension system had been comprised over time. The spring system had to be re-worked,which may require you to break a sweat but it is completely worth it.
Take pictures, before and during your upholstery. As much as you hate the old fabric from the sometimes stinky chair you may want to keep it for a pattern. Take detailed pictures of how it is pieced and where tuck and seams are placed. Continue taking pictures as you rip off the old fabric. You never know where some secret to securing the fabric may be hidden. I only post a few photos on the blog but I really have about 2 dozen during photos. Do not skip steps. Check out your chair fully before moving on to the next step. Get the right tools but they don't have to be new. Check out Craigslist or thrift stores.
I learned that upholstery is very little sewing and more nailing and folding. It does take planning and some creative manipulation. I lightly tack fabric as you go and then going back and secure it in place once you are sure the fabric is where you want it. Jenny no longer wanted the buttons that were on this chair. I cant say that I blame her. ( If you see something that looks like this don't instantly walk away it may have a new life ahead of it.) If you paid $20-$30 for a chair like this and spent $60 on the 5yds of fabric to cover it yourself you will have made out like a bandit. Lets say that you don't want to do the work yourself. Shop around for the labor and you may be able to find a reasonable price without breaking the bank.

Friday, July 6, 2012

Kitchen Window Valance with Grommets

I received a request to make a set of kitchen valances. They are pretty simples item to make. That is until you add the grommets. Marla picked up the "no tools required kit from Joanns fabric. I had never used them before but it seemed pretty cut and dry. In the past the ones that required you to put some muscle behind them and things could go wrong.
Although the package said no tools required I would recommend having really good scissors or using what I did which was my 18mm rotary cutter. There is not a lot of room for error with these if you go outside the lines of the template. You run the risk of having a gap between the fabric and the ring. I would also use "No Fray" or what I did hot glue to prevent unraveling. I figured that this way I would not have to worry about the strength of the snap closure holding up to a medium weight & lined material. Other that that they seem like a pretty good product.
I think they came out very nice. Marla likes them and I'm sure her little ones are happy that they can eat their breakfast now without the sun in there eyes.